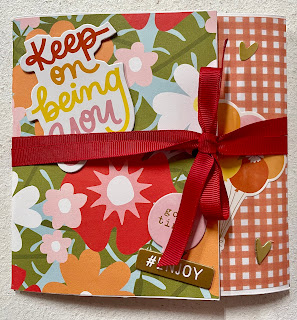
Creating an Envelope Trip Journal to Go
Welcome to Paper Crafting With Rebecca! I am so pleased that you are taking the time to stop in for a visit today. Thank you!
If you follow me blog or subscribe to my YouTube channel you may have seen my video where I did a brief walk through of a "Trip Journal to Go" (here is the link in case you want to go back and watch that one... Envelope Trip Journal to Go!). Because of that video I had some requests to create a step by step video showing how to make your own trip journal to take along on your next trip! Here is that video...
As I promised in the video, I will put some of the measurements I used to create mine below...
- 4 A2 envelopes
- 2 pieces of cardstock cut 5.75" square
- 2 pieces of patterned paper cut 5.63" square
- 4 pieces of patterned paper cut 2.75" x 5.75"
- 4 pieces of patterned paper cut 4.75" x 5.75"
For the vellum pocket I cut my vellum to 6" x 4". The embossing folder I used was 4", so this allowed for 1" on either side of the embossed pattern for me to create my "accordion fold" with.
I used all sorts of ephemera and embellishments from my stash and I encourage you to dig through your stash and use what you have, too! I also used a dimensional sticker I had made. If you want to see how to make these stickers check out Create Your Own Layered Stickers where I walk you through that process.
A couple of things to keep in mind:
- I made this journal so it's completed size is just under 6" square and is easy to pack and fill during a trip. However, you could make a larger one using larger envelopes... just adjust your cardstock and patterned papers sizes accordingly.
- The example I made for this trip is a "Summer" themed one, but perhaps you are going to a wedding, or wine tasting for the weekend, or a class reunion... create a "trip journal to go" for those sorts of trips, too!
Here are some pictures of today's example to help inspire you:
This is the back... I keep it simple and flat
for easy packing into my overnight bag.
Here is a picture of it completely opened up. You can
see that I have four journaling cards slid into the envelopes
ready to write on during the trip so I don't forget anything!
Along with the journaling card, there is plenty of room
in the envelope to slip in other mementos from the trip, too.
I put "blank spots" on the page, too, in case I want to
record a date or title for that envelope (such as I did
with the tickets on this page). It personalizes the page.
The pocket in the center of the journal comes in so
handy for those bulkier mementos. Being in the very
center also pads/protects the contents of this pocket.
Although each pocket (envelope) is decorated differently,
I try to keep the colors flowing from one to the next.
It is sometimes tempting to use a lot of foam tape when
first designing your journal... but remember it needs to be
able to close AND have room to hold your trip mementos.
This is the first page you see when you open the front up.
I like to tie mine closed with a ribbon, but you could
also use velcro, a magnet, or a belly band to keep it closed.
I hope you enjoyed learning a little more about how I create my trip journals BEFORE I leave for my trip so that I can fill it as I am on the trip. Once home all I have left to do is to print the pictures and include them in the appropriate envelopes.
Let me know below if you do this, too! I also want to read any other suggestions or comments you may have.
Thank you again for joining me today...
Happy Paper Crafting,
Rebecca


Comments
Post a Comment
Thank you for your comment, I will try to reply as soon as possible.